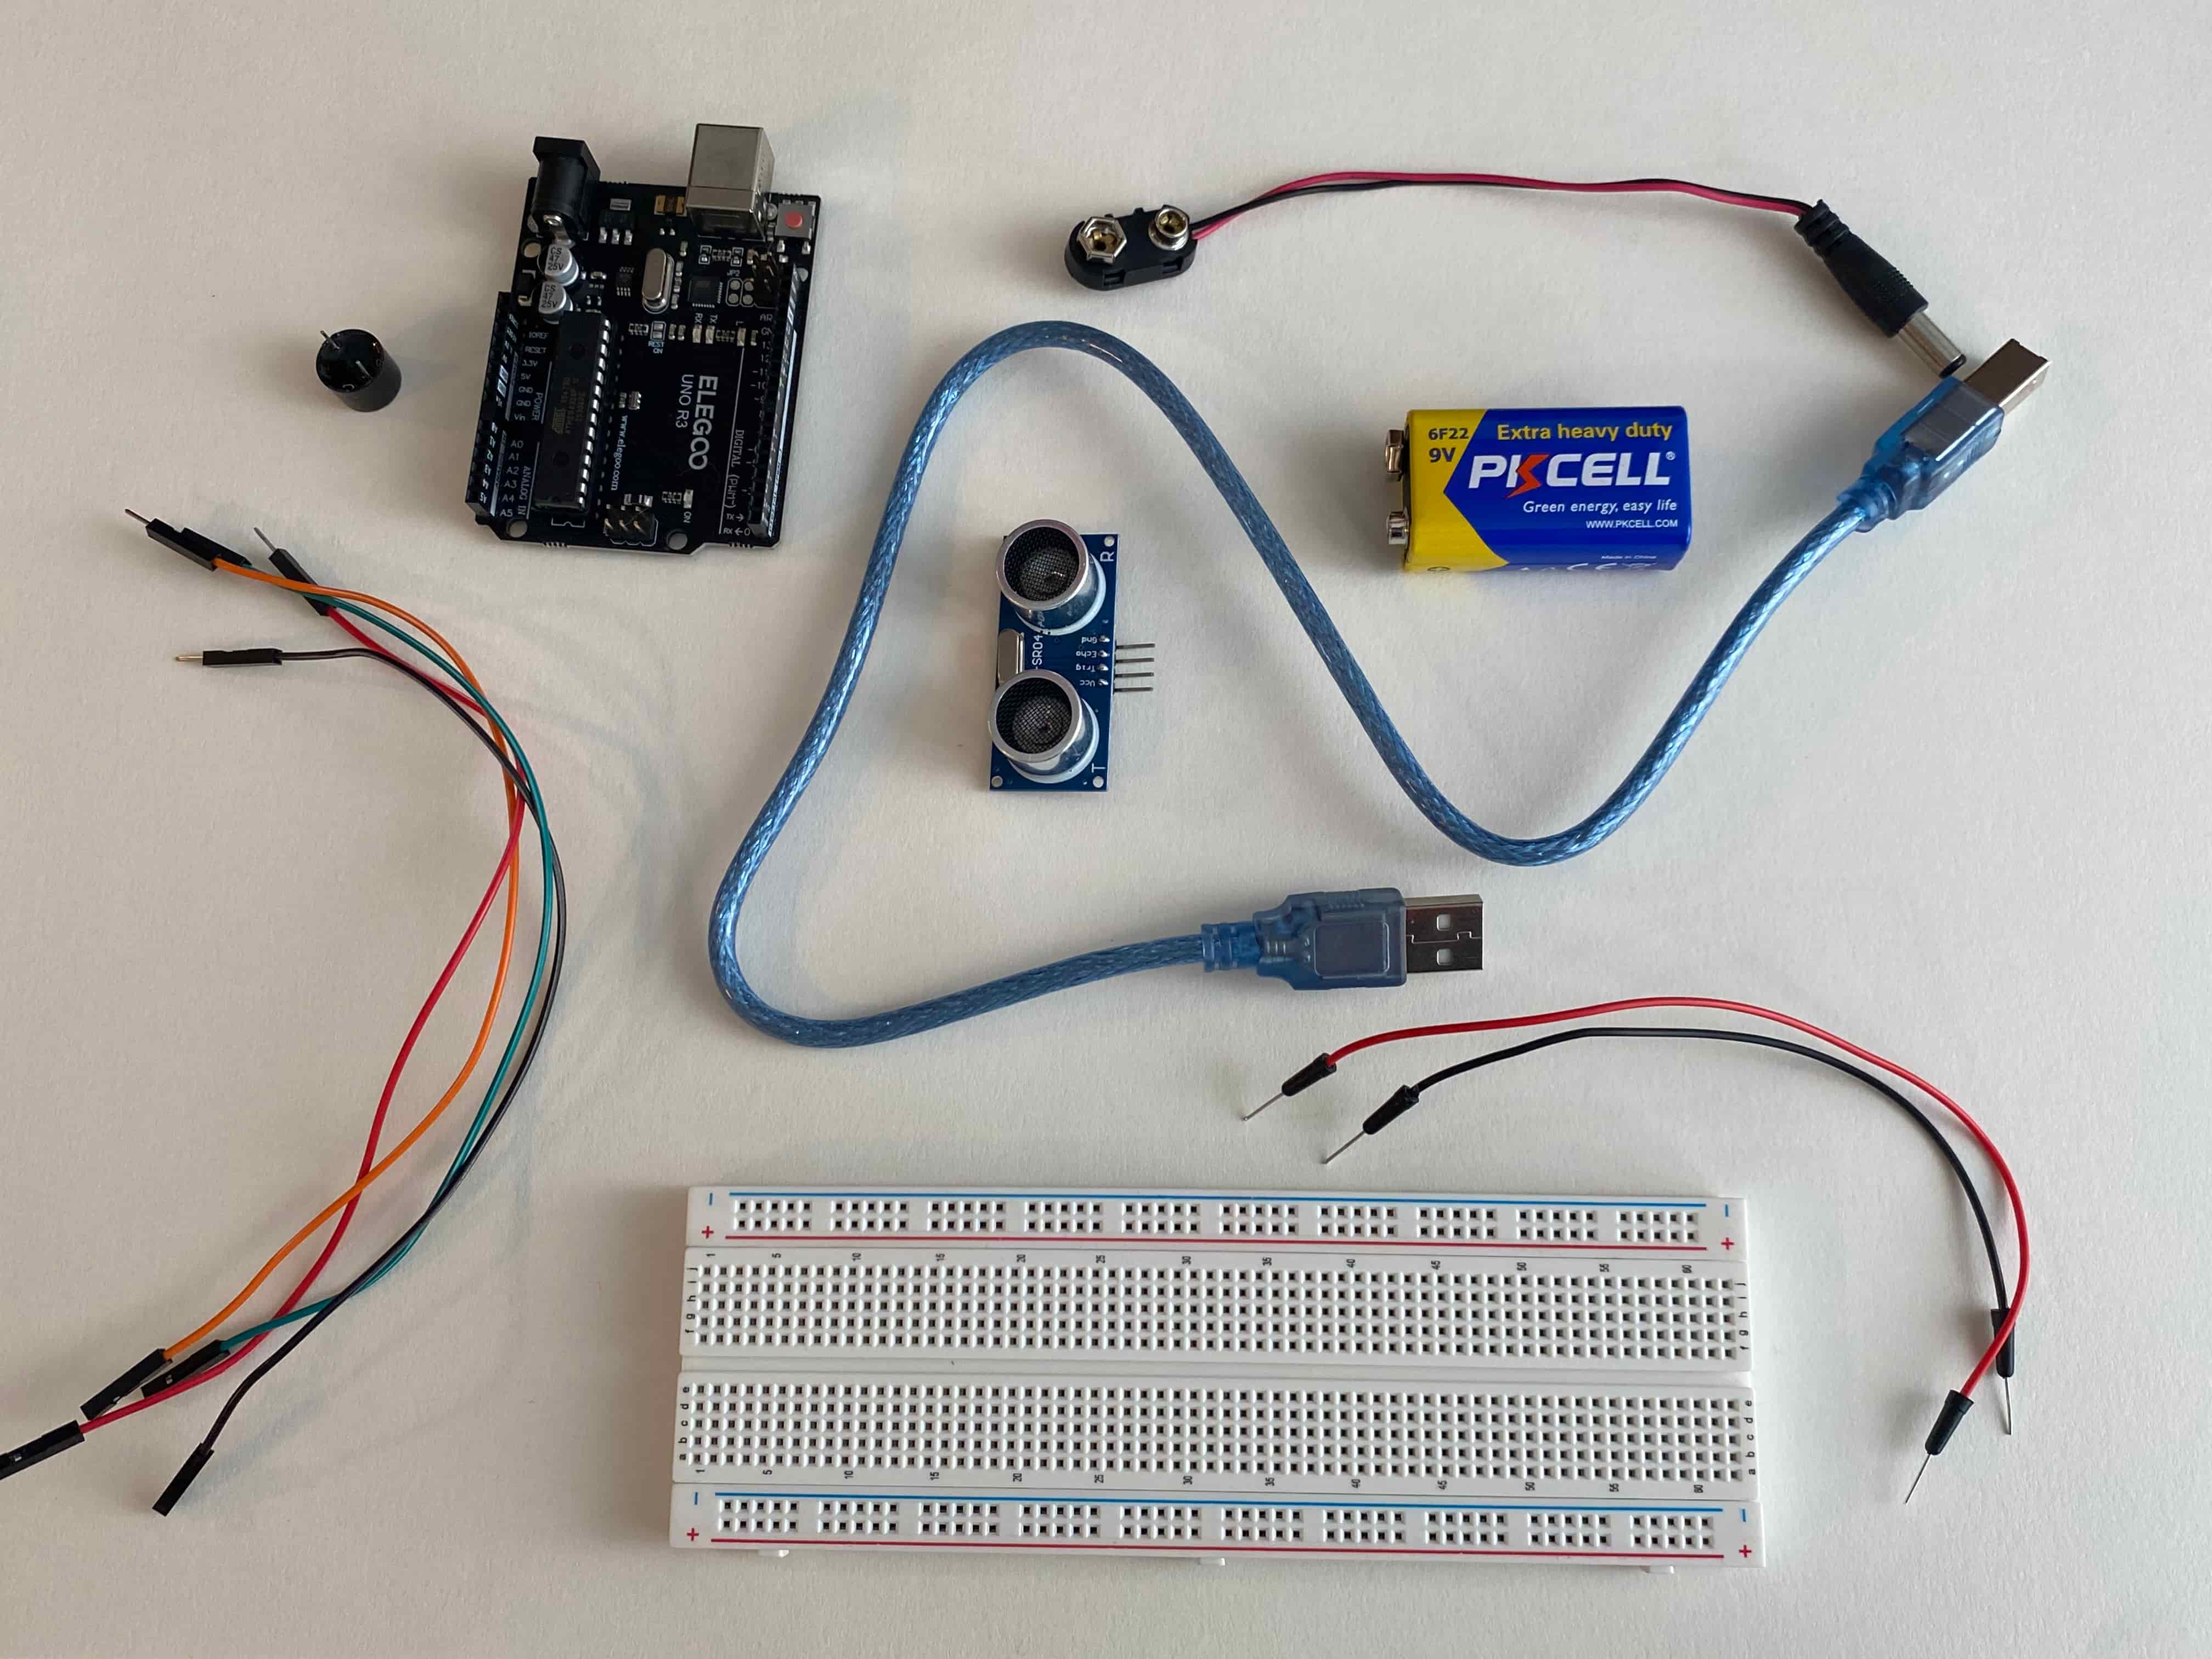
For this project you will need an Arduino Uno (or compatible), an HC-SR04 ultrasonic sensor, an active buzzer, a large breadboard (I used an 830 hole board), 4 female to male jumper wires, 2 male to male jumper wires, a USB-A to USB-B cable, 9V battery, a 9V battery snap connector, and a computer with arduino IDE installed.
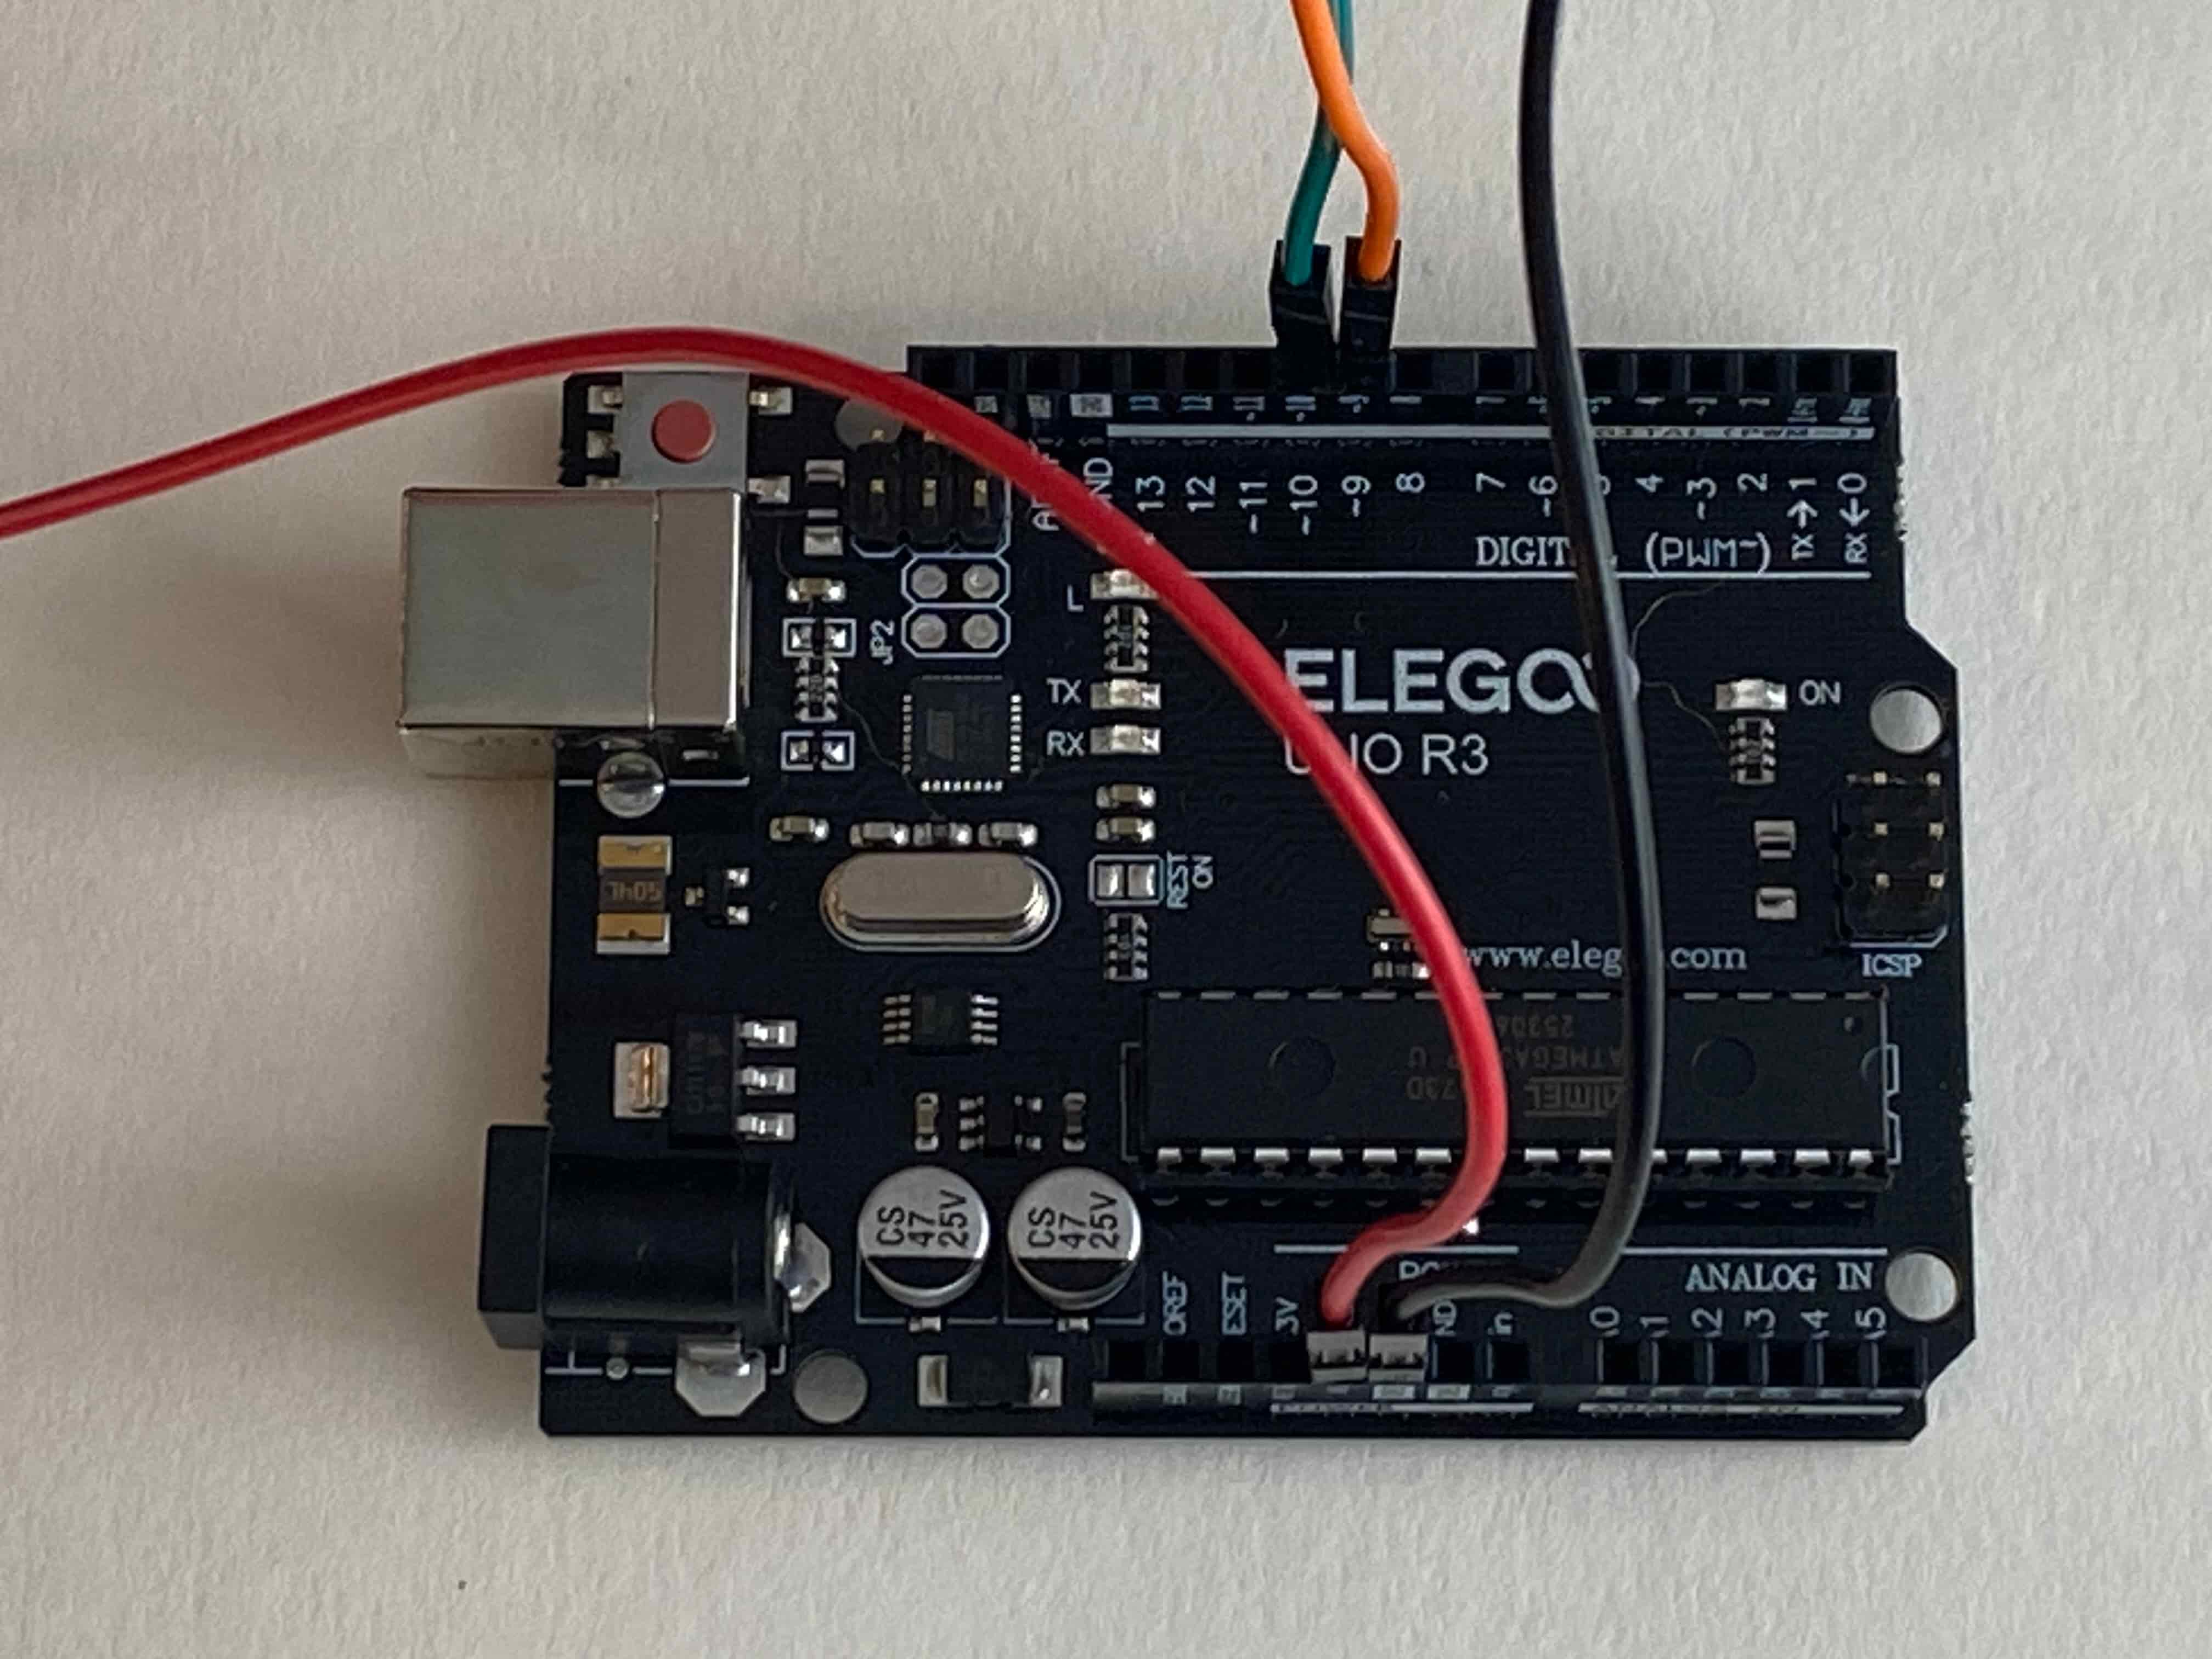
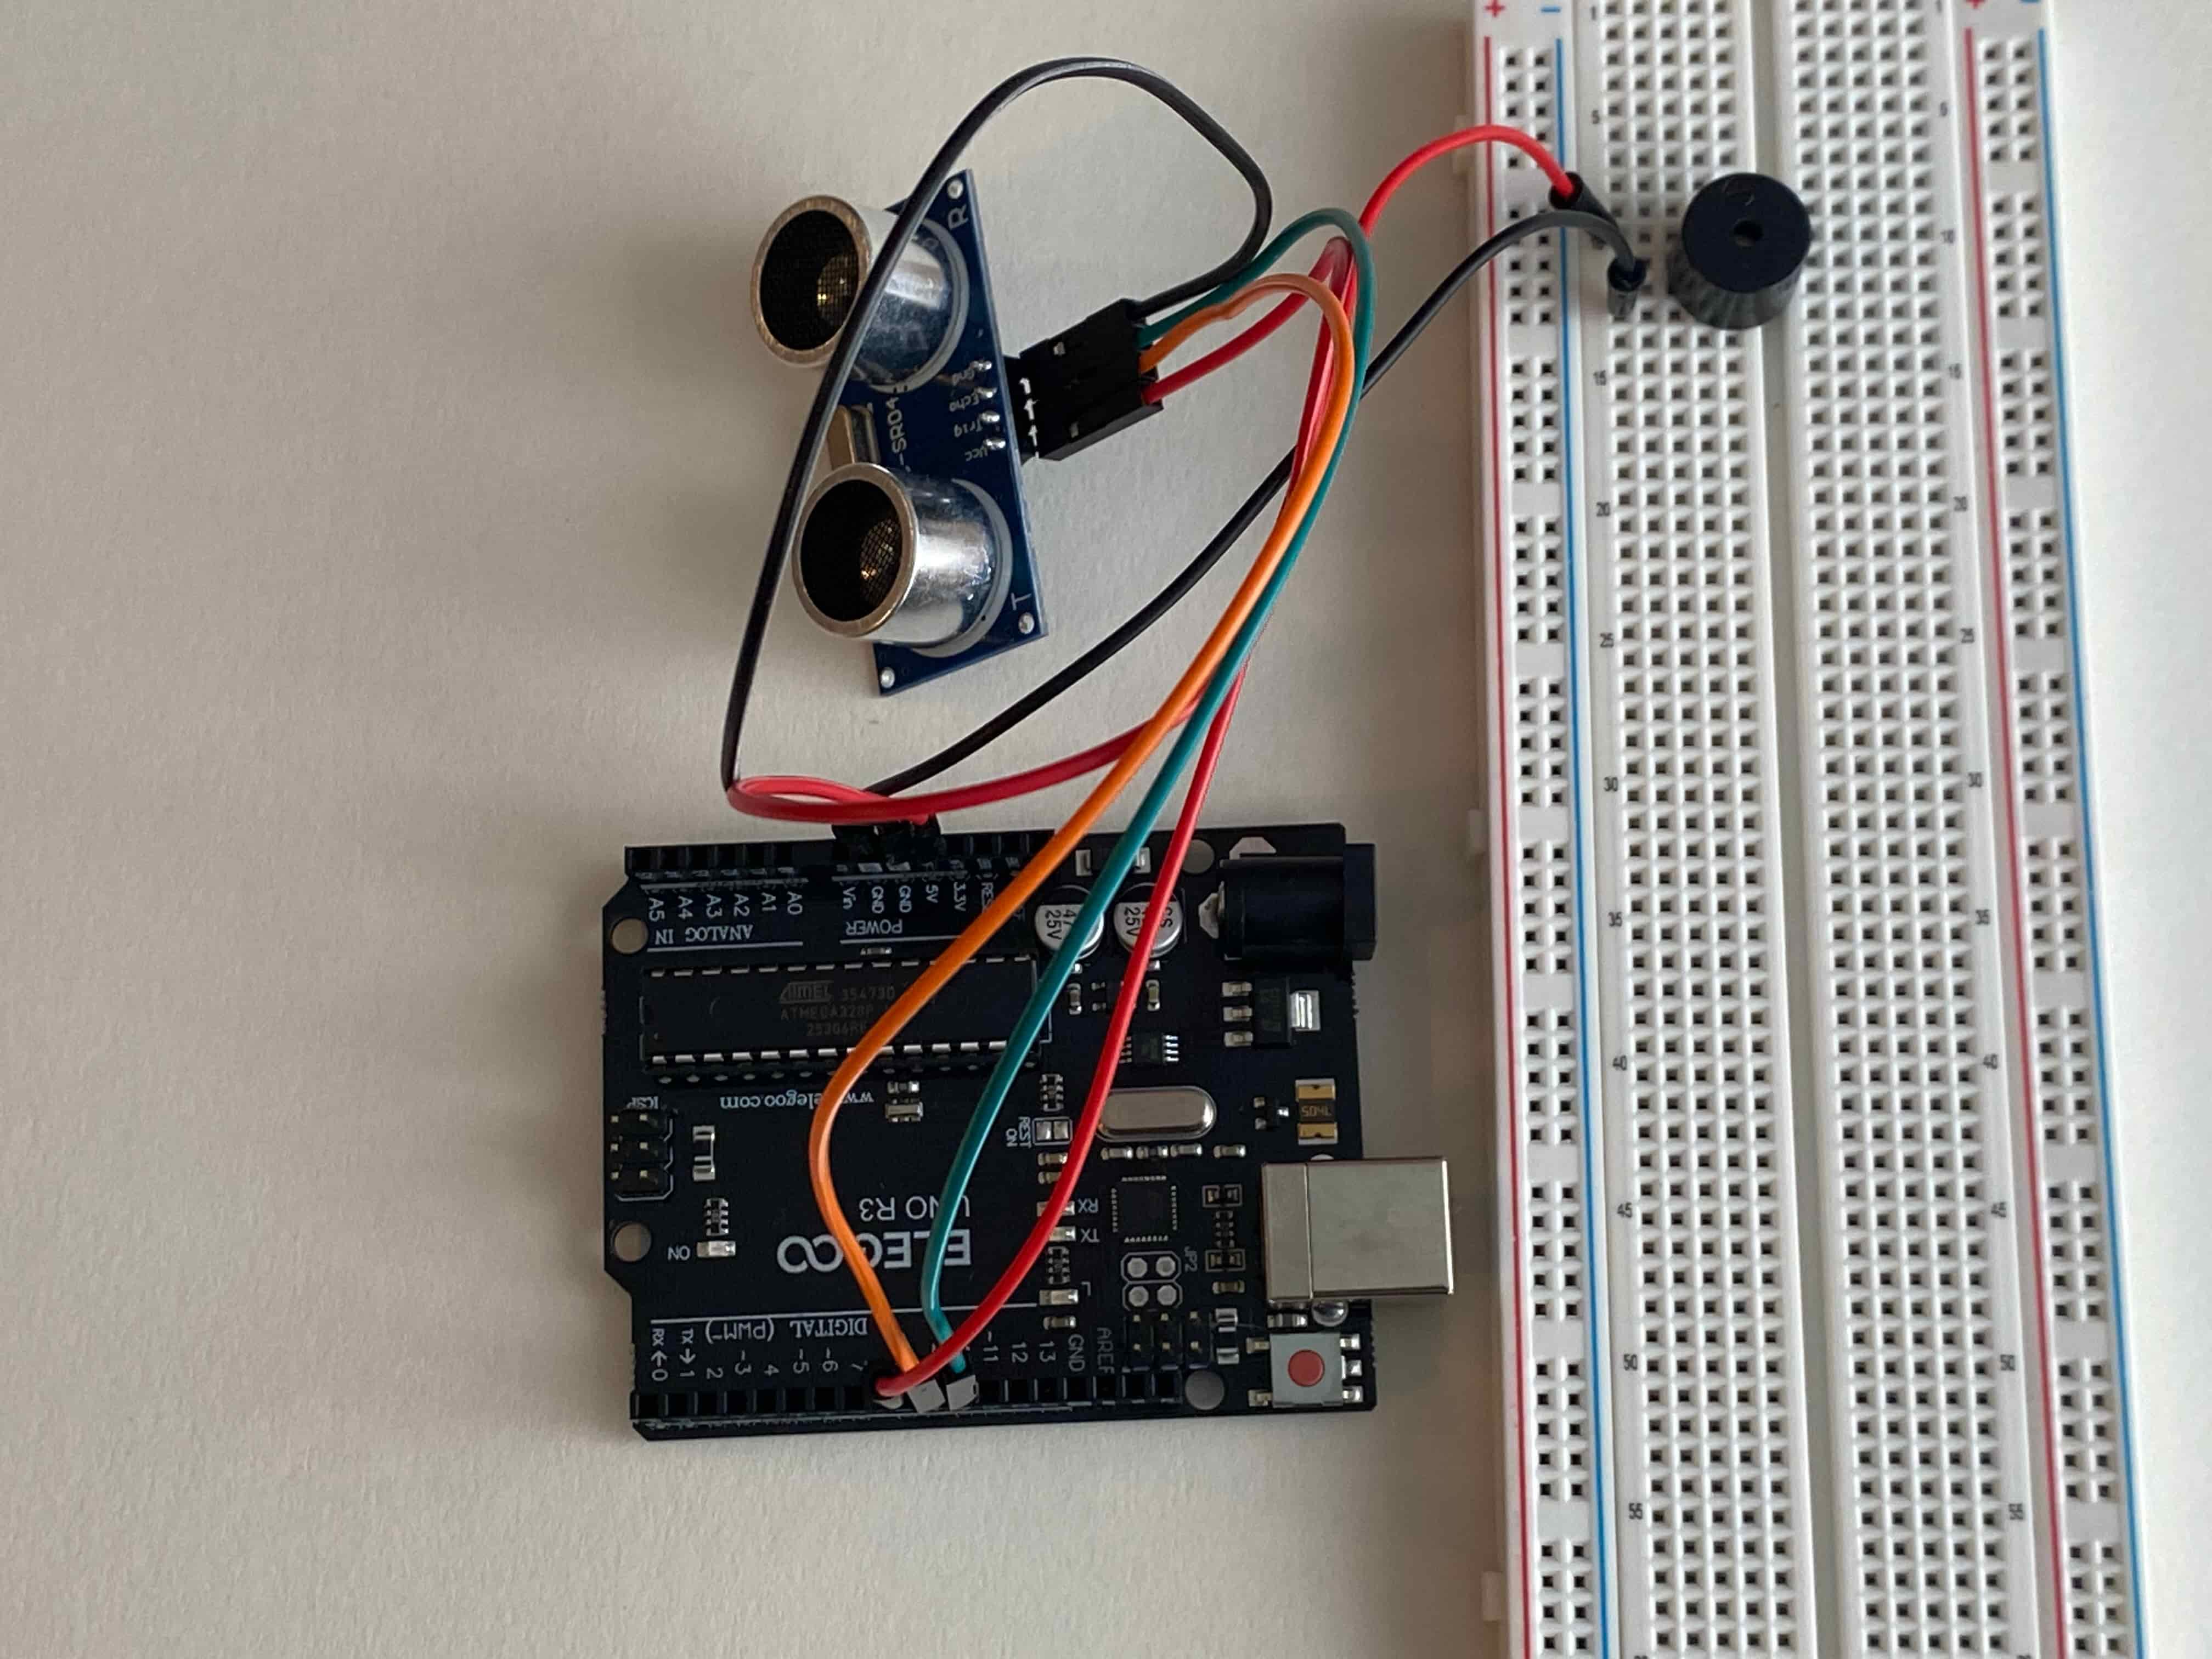
This step will require all of the male to female wires. Connect the red wire to the 5V pin. Connect the black wire to the GND, next to the red wire. Connect the orange wire to pin 9. Connect the green wire to pin 10.
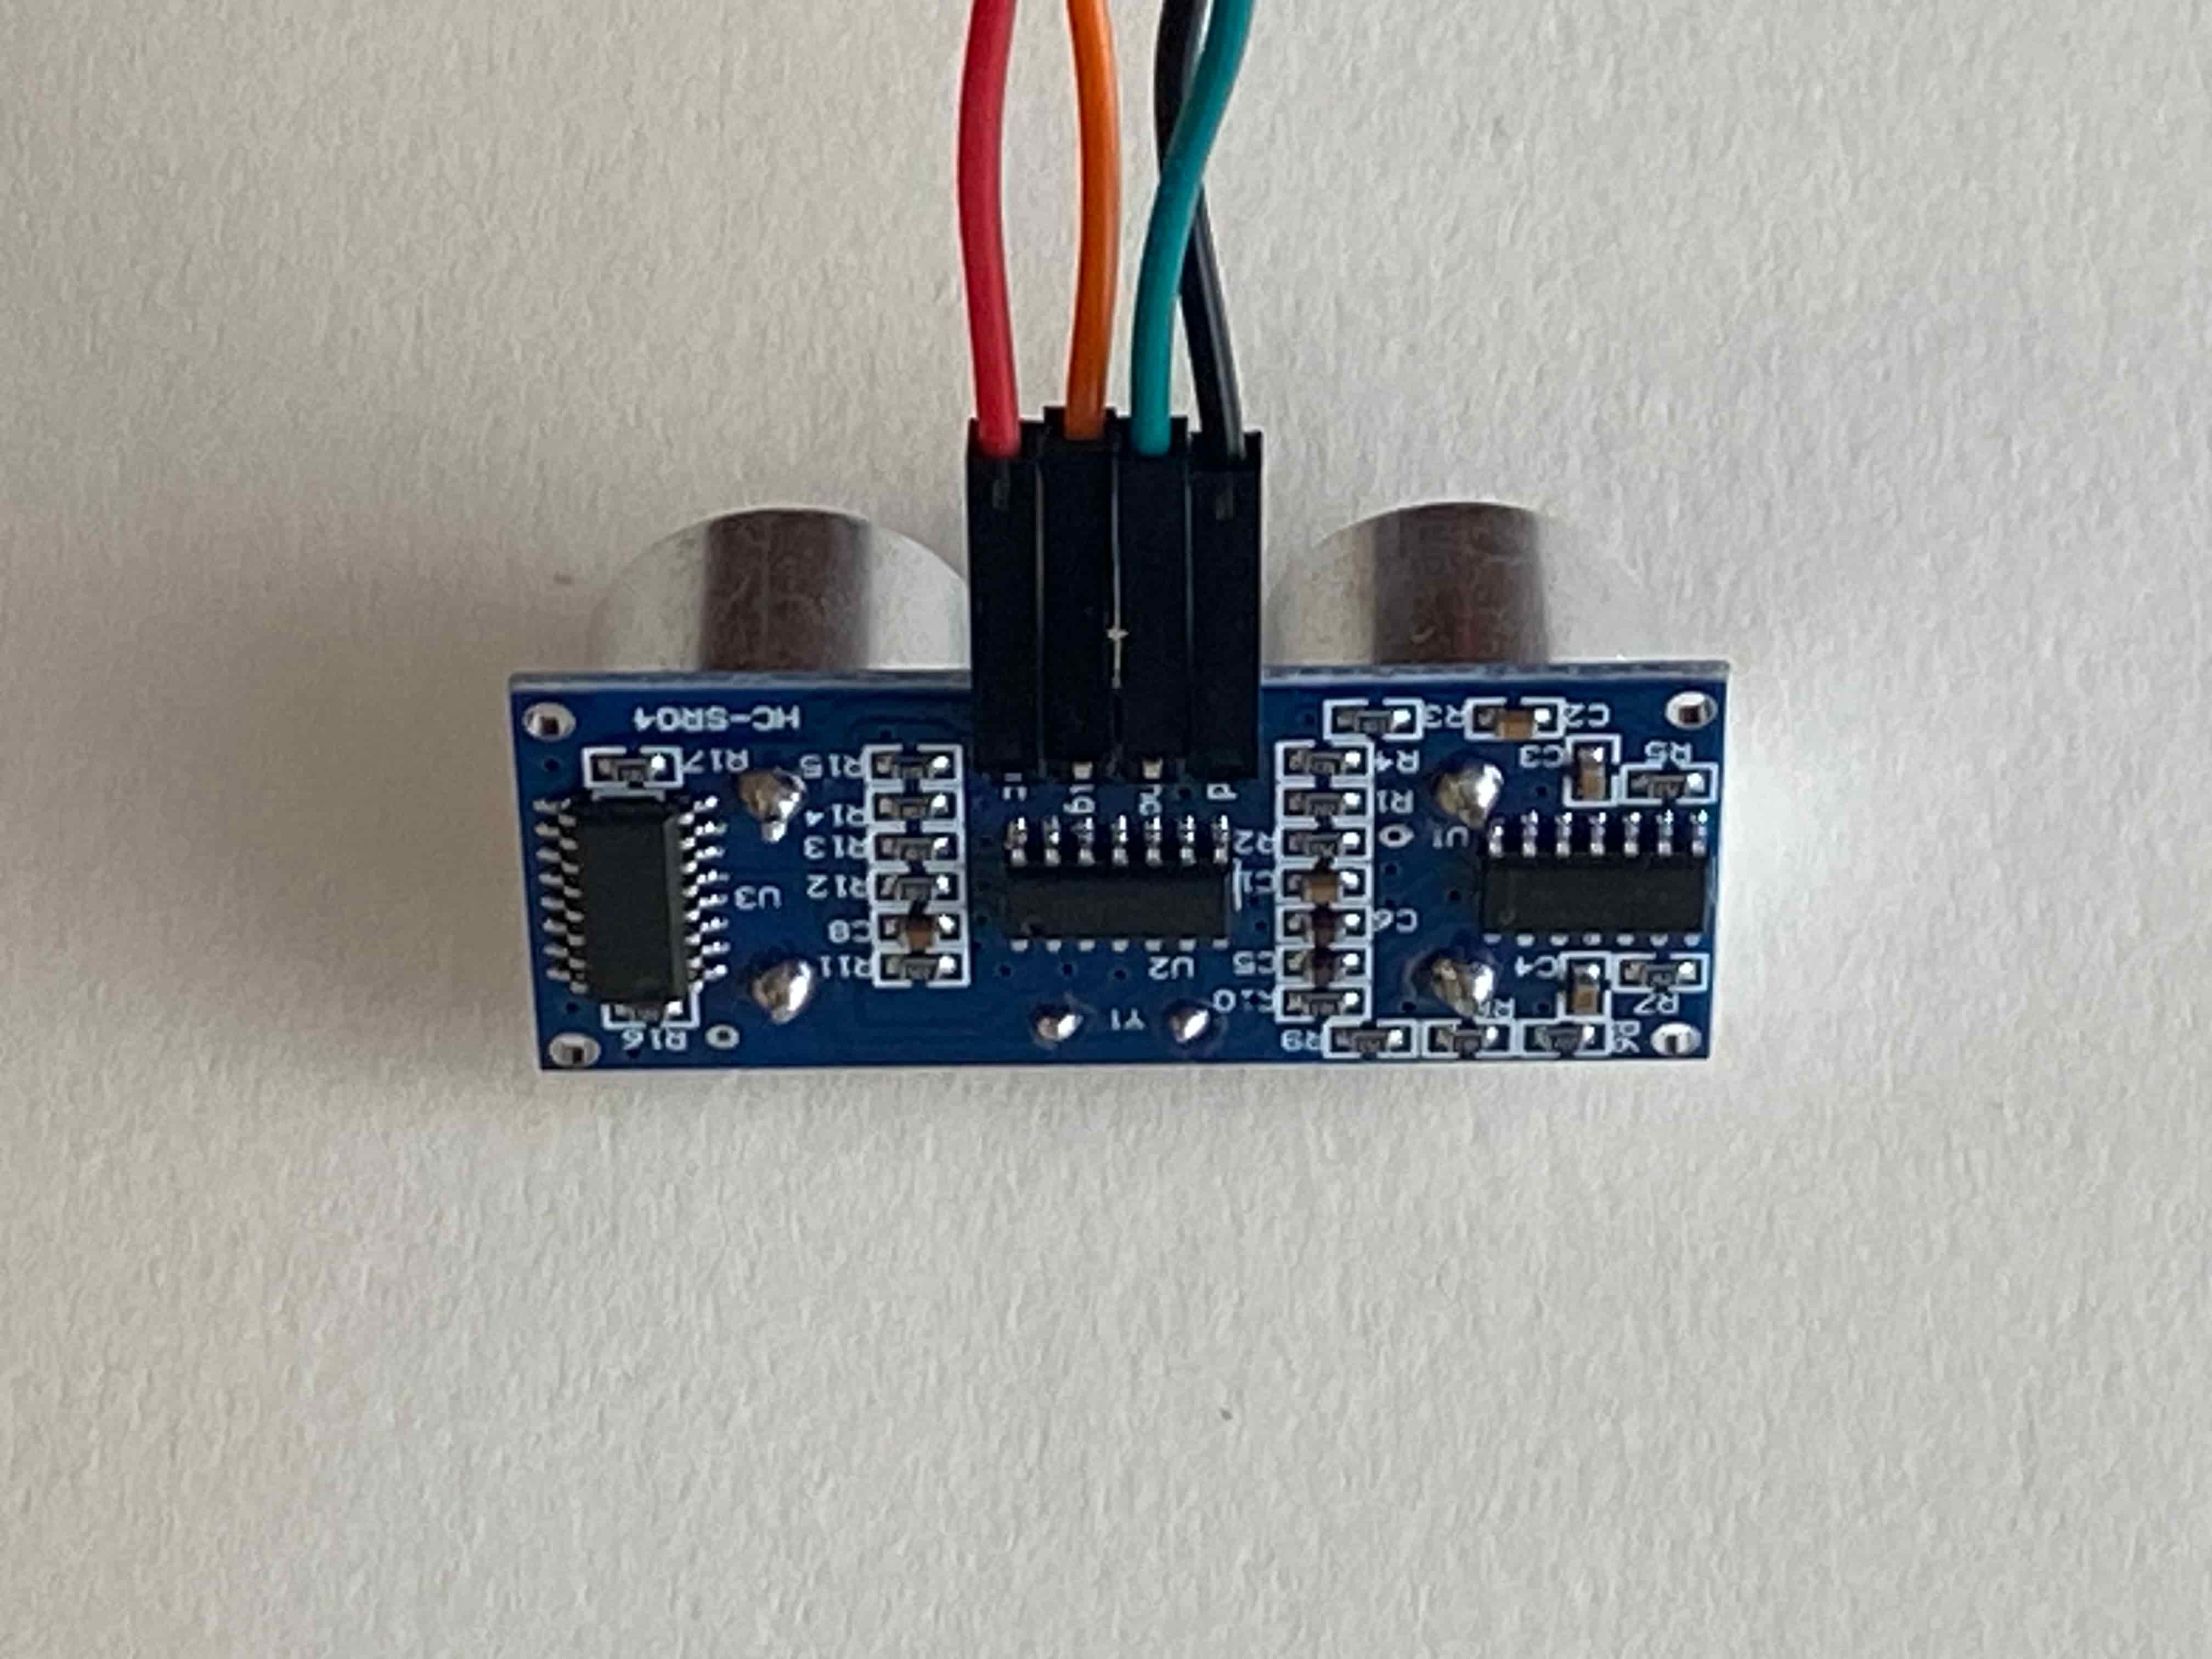
This step will use the male end of the wires used in the previous step. Connect the red wire to the VCC. Connect the orange wire to the trig. Connect the green wire to the echo. Connect the black wire to the GND.
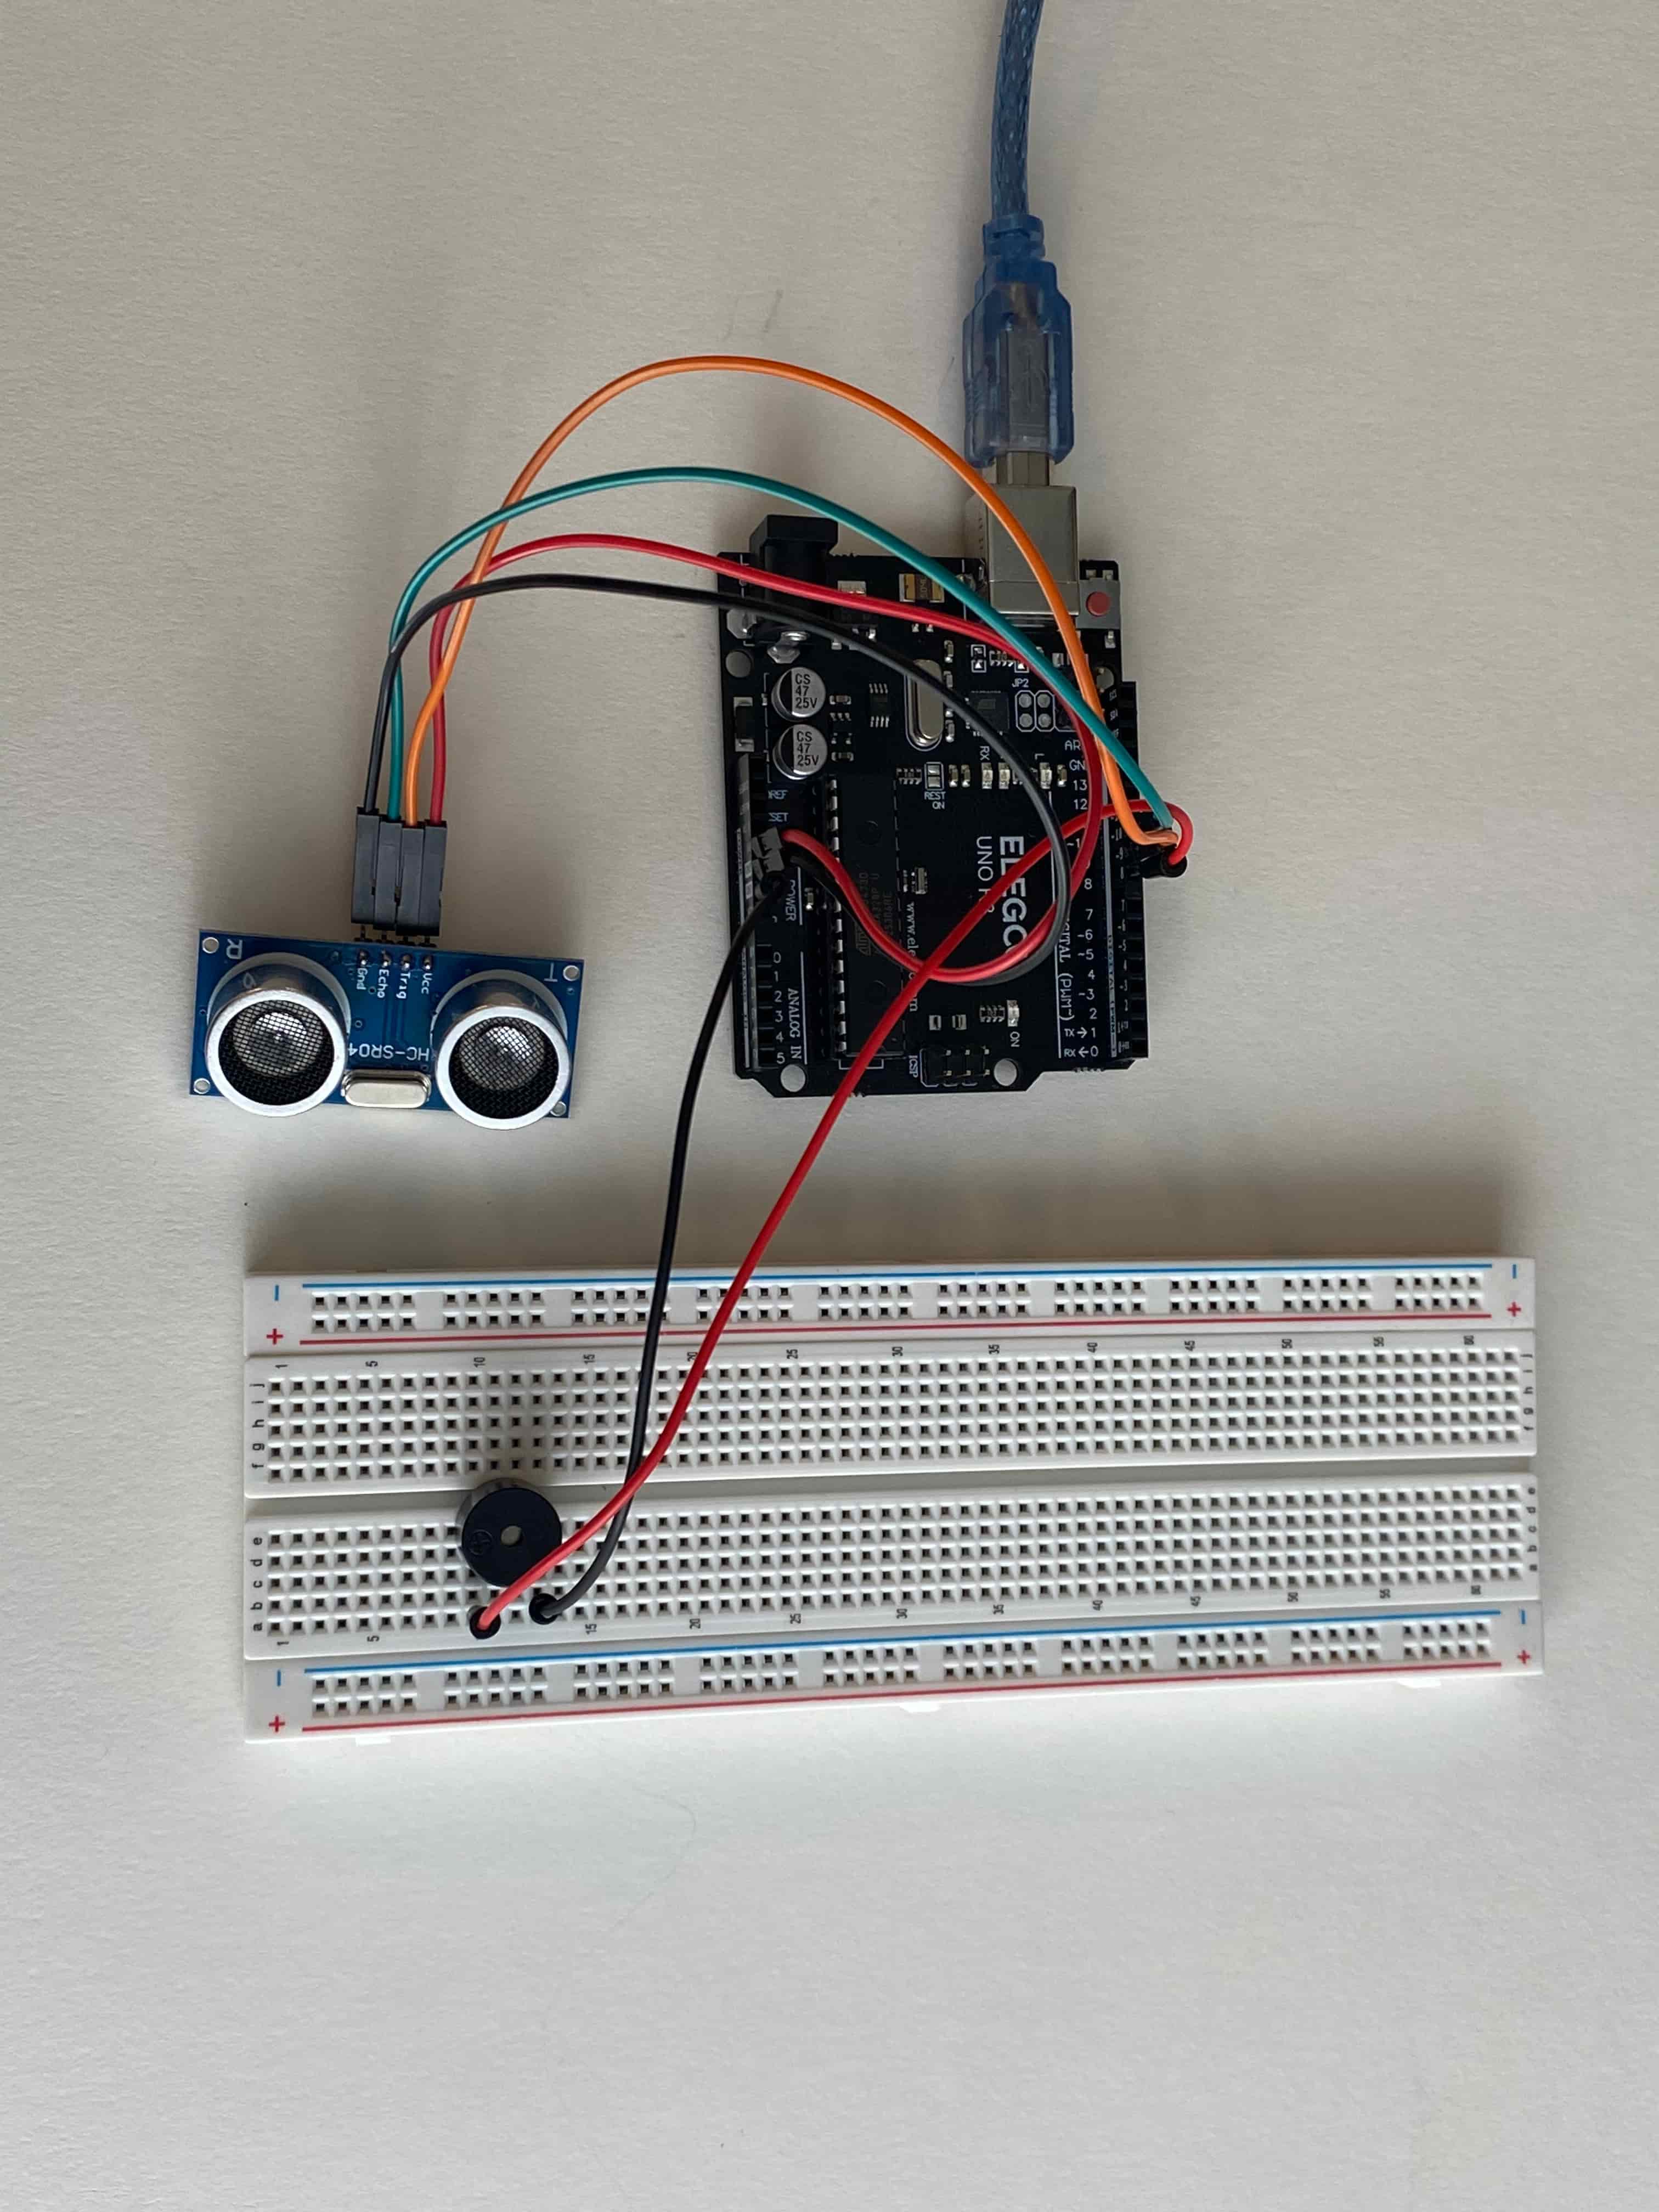
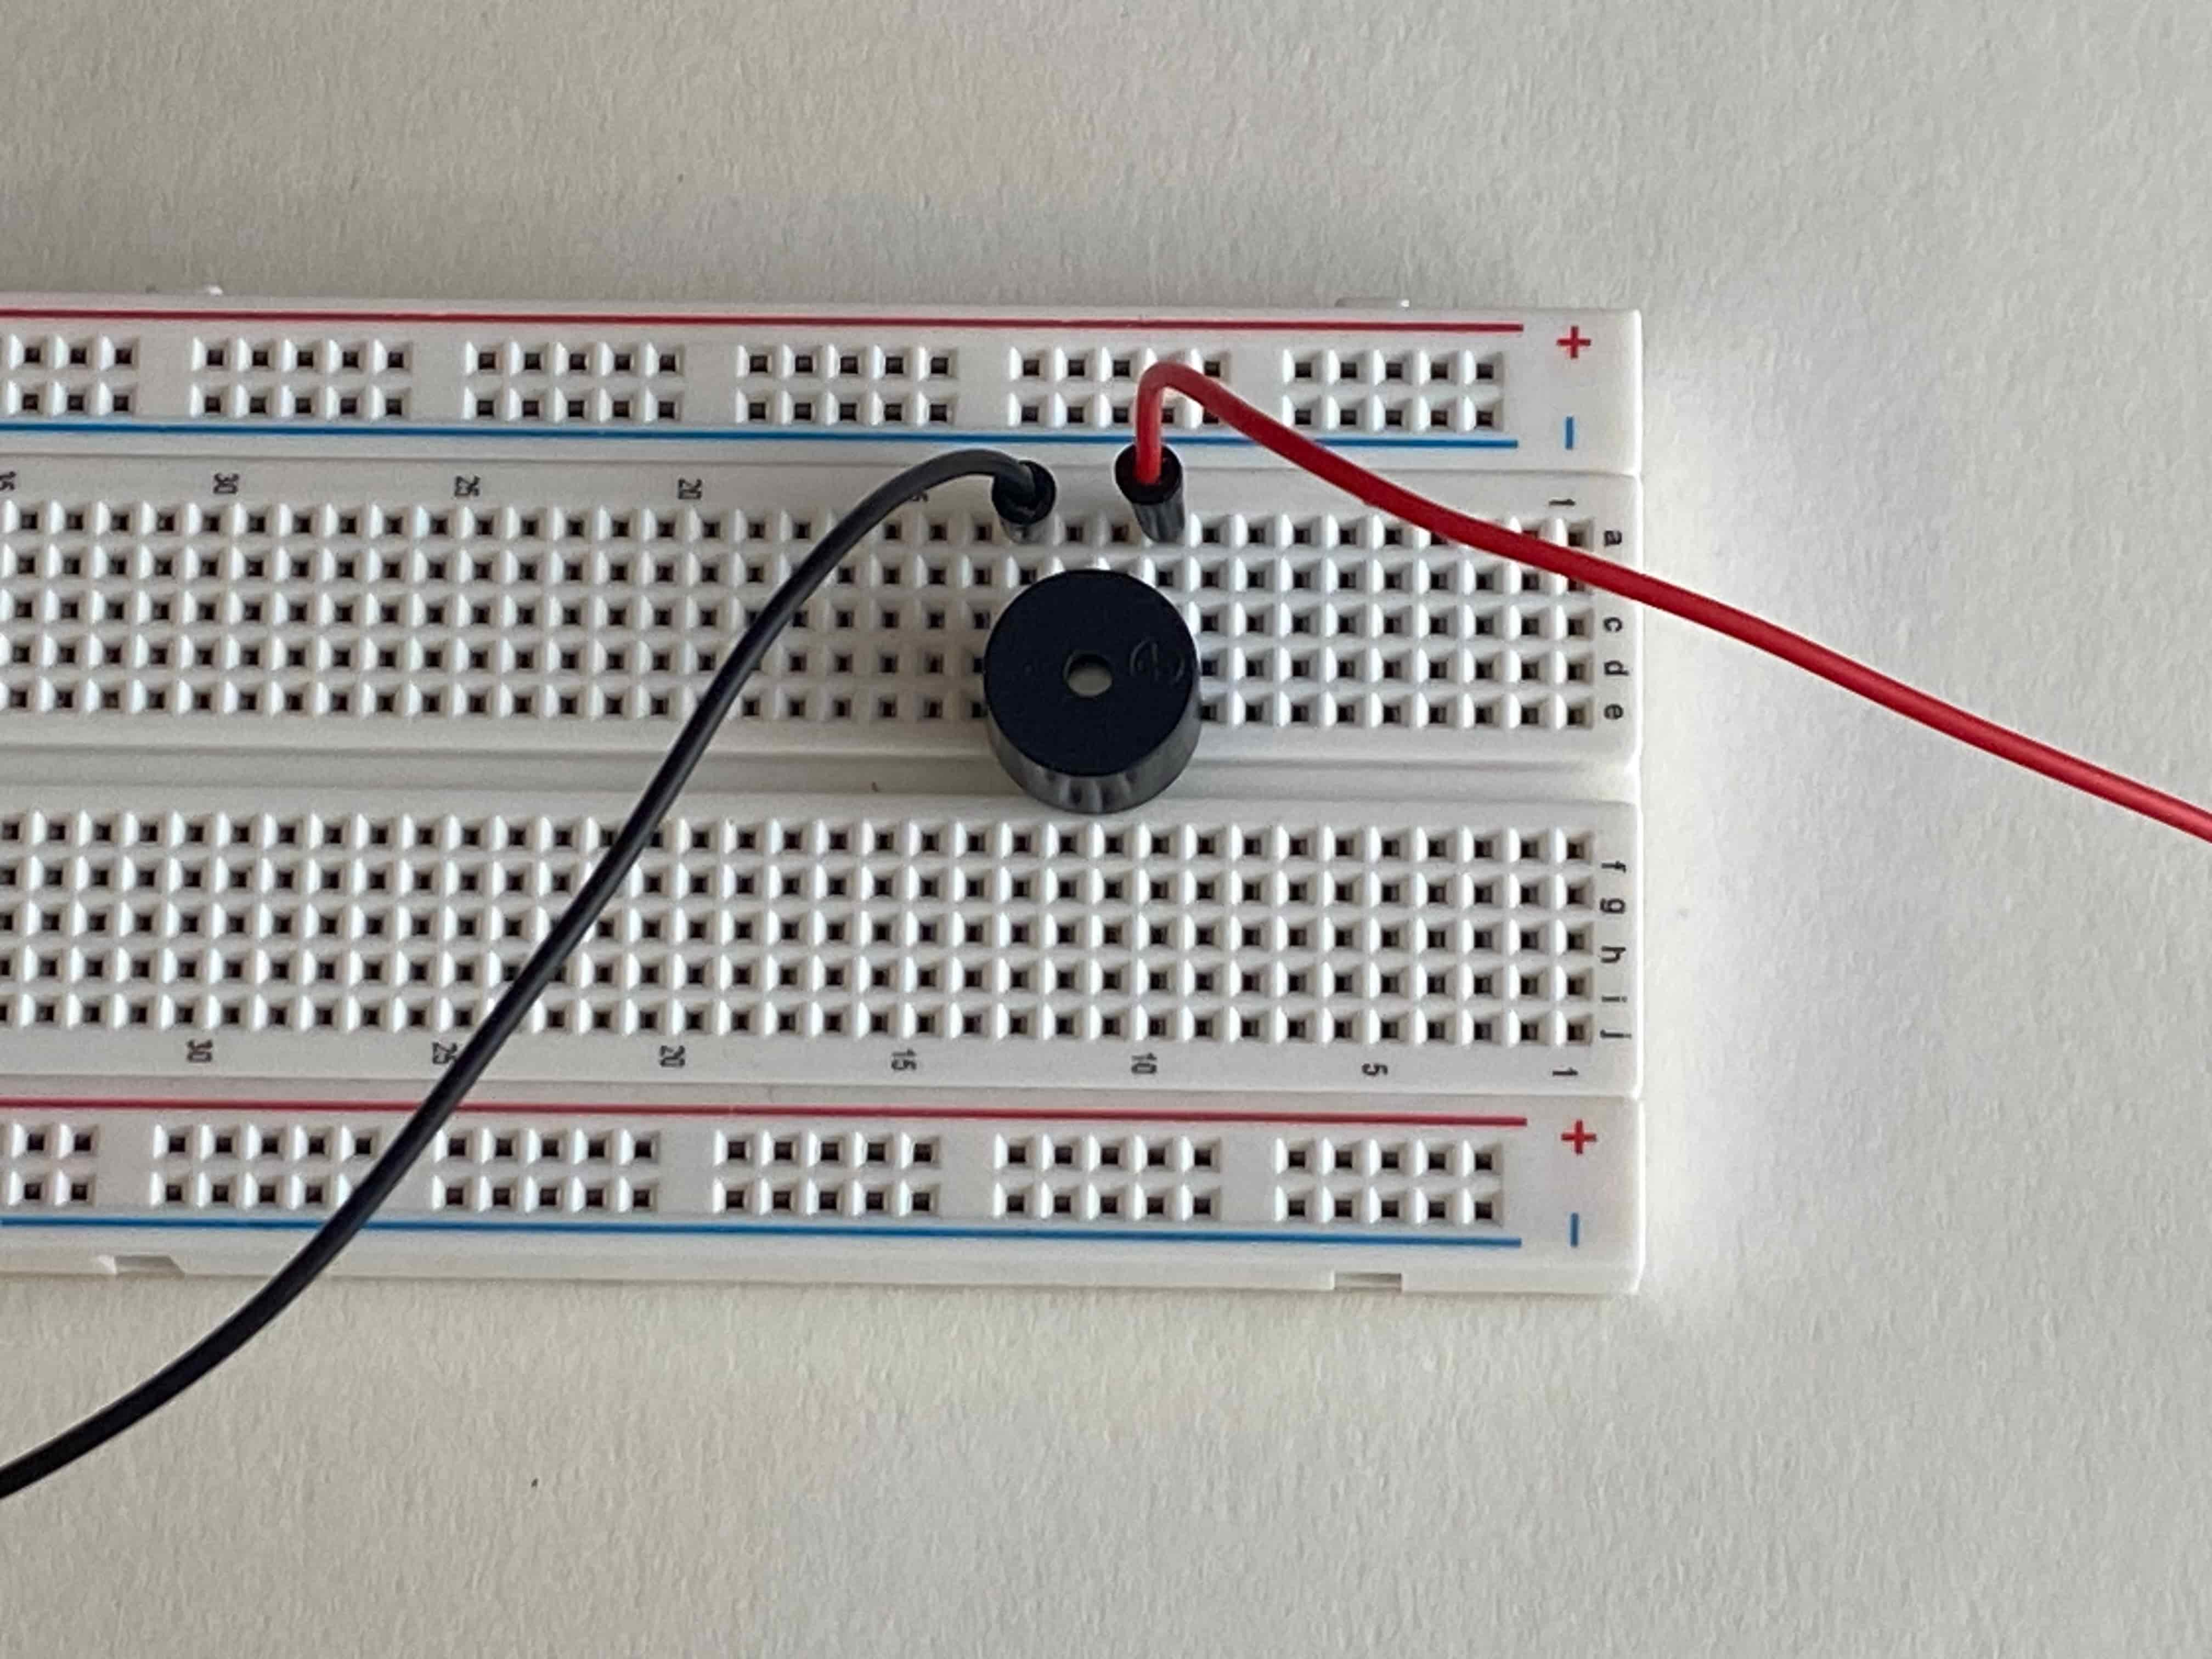
Put the active buzzer on holes E10 and E13. The longer leg (positive) should be in E10, the shorter leg (negative) in E13. Now, take a red male to male wire and put it in hole A10. Then, the black male to male wire in hole A13.
Connect the red wire from the buzzer to pin 8 on the Arduino. Connect the black wire from the buzzer to the other GND on the Arduino.
Connect the USB cable to your computer with the other end plugged into the Arduino. Open Arduino IDE on your computer. Make a new file and paste the code below. Make sure that in the top left corner your Arduino board is selected. Then, hit upload which is a → circle in the top left.
const int trigPin = 9;
const int echoPin = 10;
const int buzzerPin = 8;

long duration;
int distance;

void setup() {
  pinMode(trigPin, OUTPUT);
  pinMode(echoPin, INPUT);
  pinMode(buzzerPin, OUTPUT);
  Serial.begin(9600);
}

void loop() {
  digitalWrite(trigPin, LOW);
  delayMicroseconds(2);
  digitalWrite(trigPin, HIGH);
  delayMicroseconds(10);
  digitalWrite(trigPin, LOW);

  duration = pulseIn(echoPin, HIGH);
  distance = duration * 0.034 / 2;

  Serial.print("Distance: ");
  Serial.print(distance);
  Serial.println(" cm");

  if (distance < 20) {
    digitalWrite(buzzerPin, HIGH);
  } else {
    digitalWrite(buzzerPin, LOW);
  }

  delay(500);
}
Wait until the code is done uploading, it shouldn't take more than 20 seconds. Then, wave your hand over the sensor. The buzzer should sound.
Find the line of code that says if (distance < 20) {. The number 20 is the distance in centimeters that the sensor will alarm at. To change and upload new code, you need to have the computer connected to the Arduino via USB before uploading.
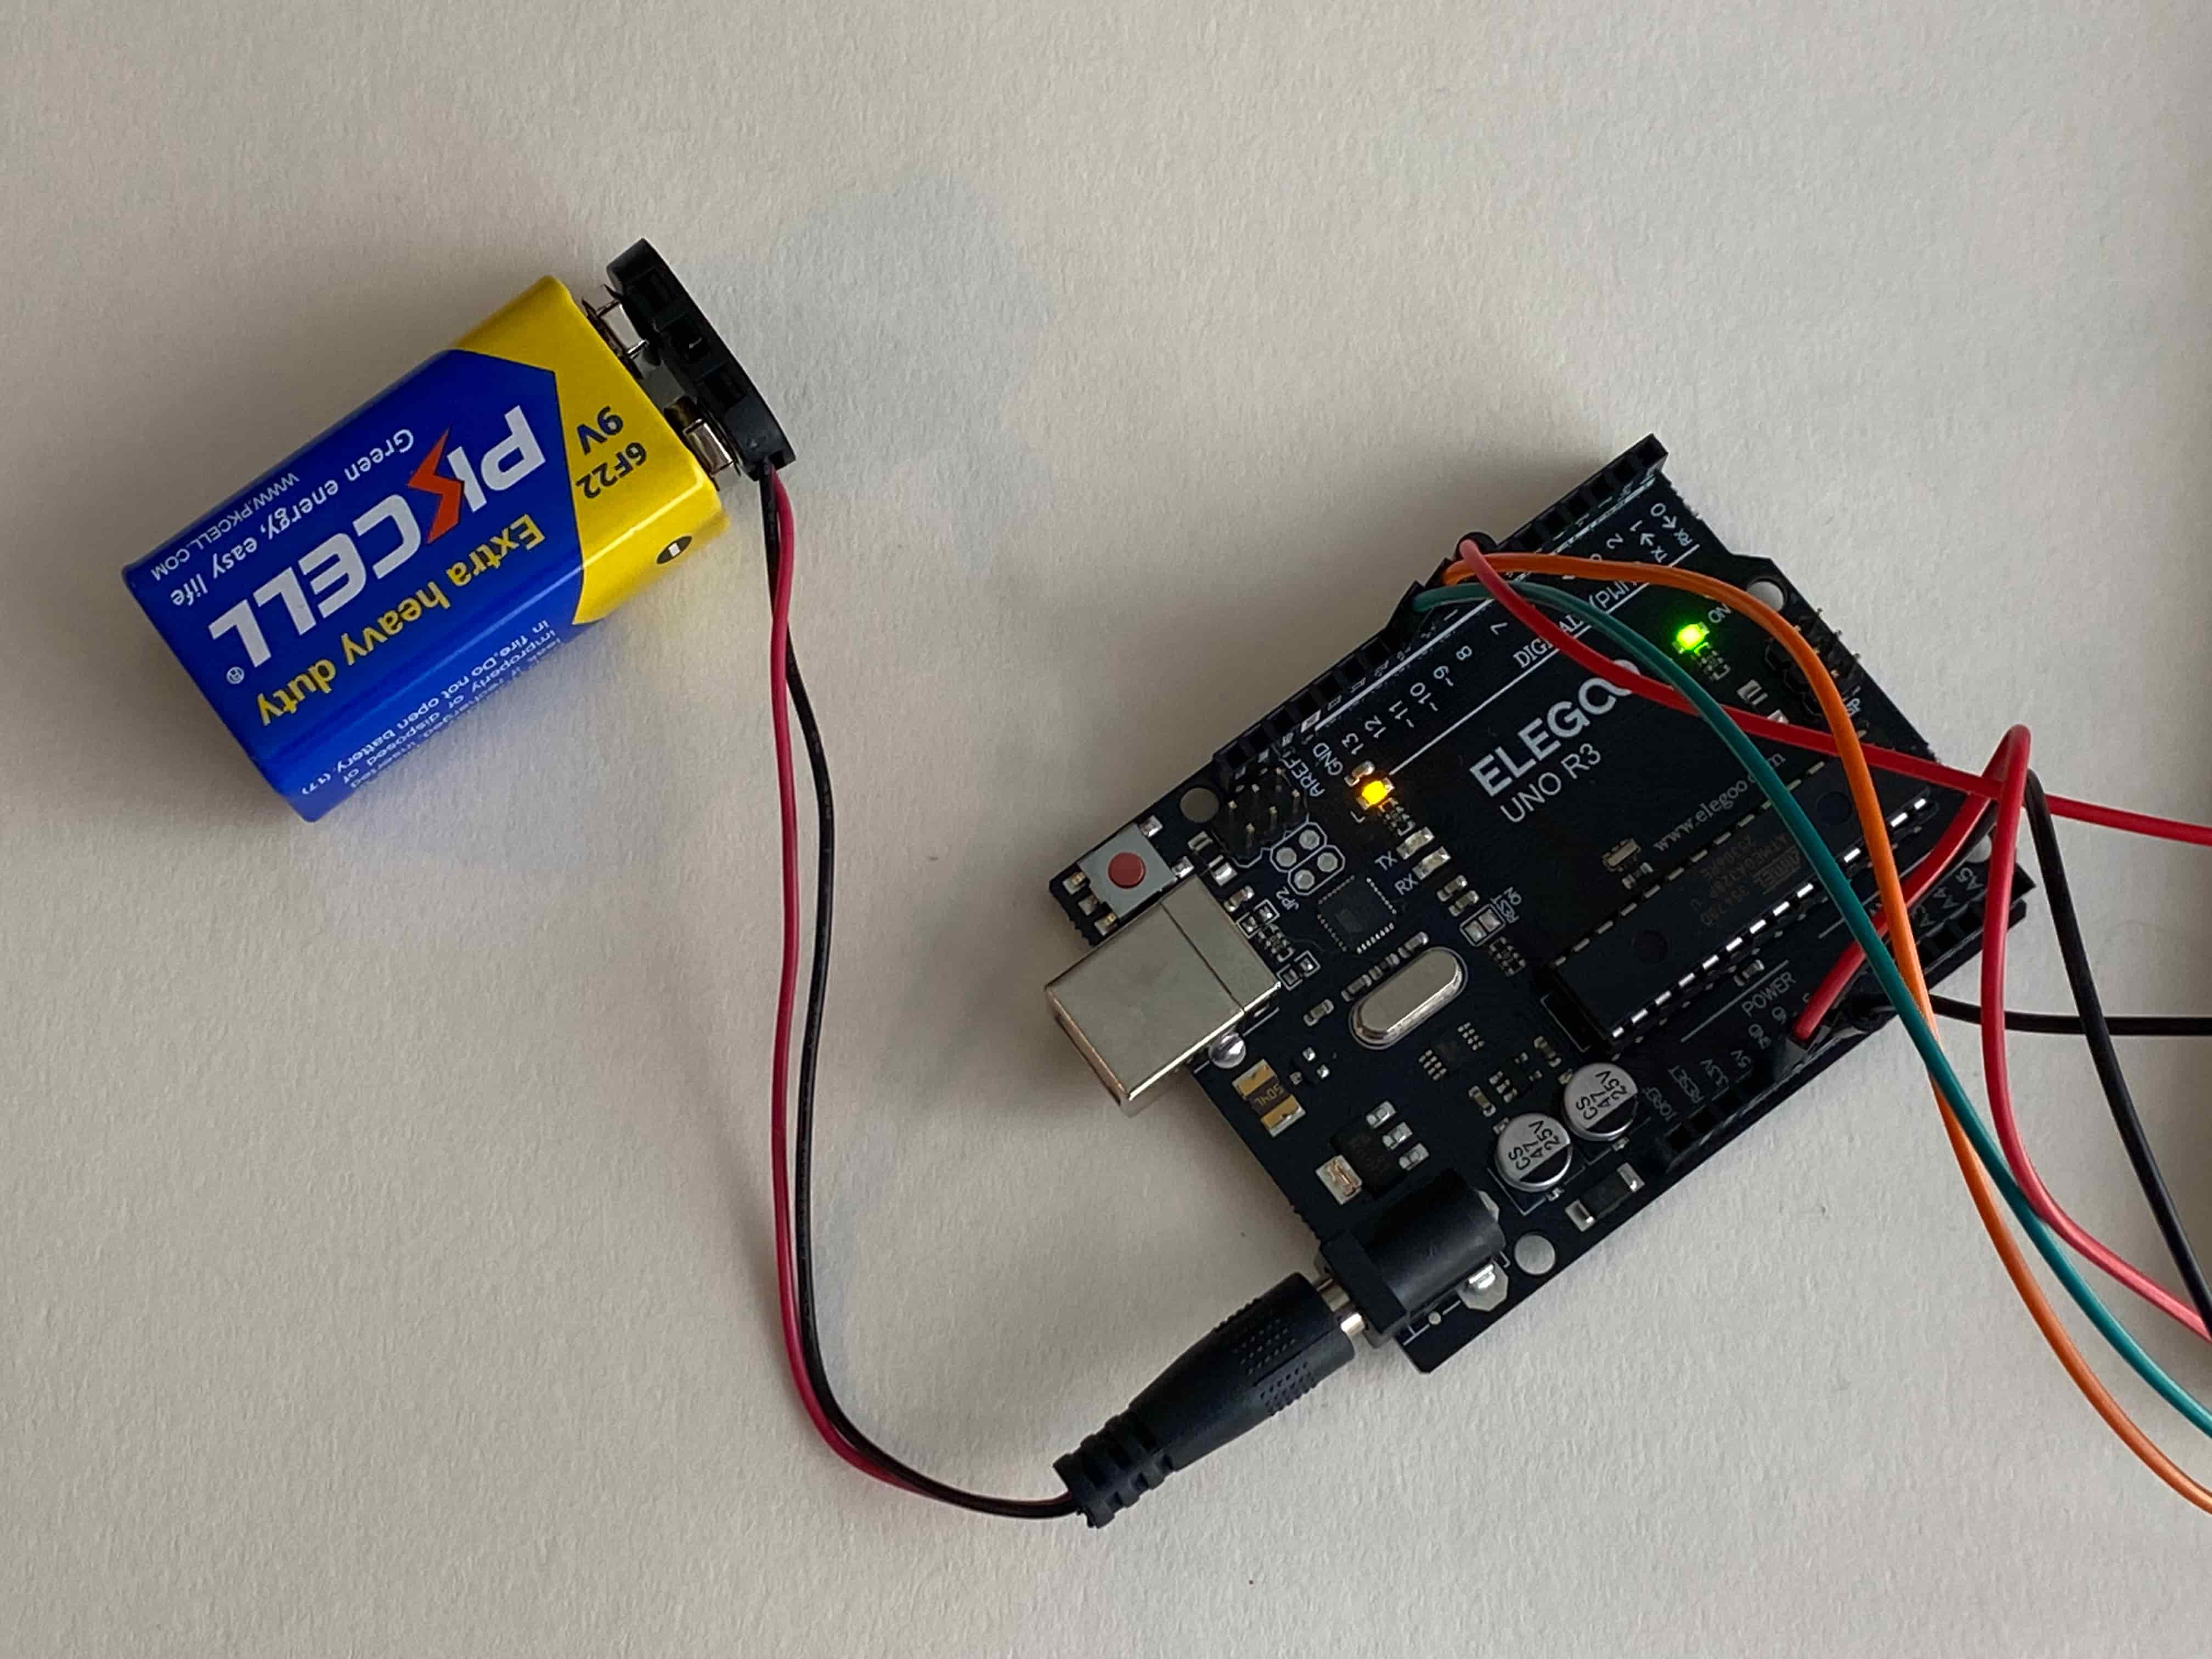
You can now disconnect the Arduino from your computer and power it with the 9V battery. The alarm will work the same, but now you can place it anywhere without worrying about a USB connection. This is what it should look like.